Stripe
Launchr uses Stripe for payment processing and subscription management. If you haven't already, set up a new Stripe account for the project you are going to use with Launchr.
Register Stripe accountDuring development
A functional Stripe integration requires valid API keys and a development machine which is reachable by Stripe via webhook.
With BYPASS_STRIPE=True configured in your settings
(the default for the development environment), the whole Stripe integration can be deactivated.
Using BYPASS_STRIPE=True will subscribe new users to the trial plan automatically.
This allows to work on the app, without the need to set up Stripe initially.
Once the app is ready to be deployed
to a production system, it is generally advised to test it at least once locally. This can be done by setting BYPASS_STRIPE=False, configuring
the API keys and setting up proper webhooks.
API keys
Log into your
Stripe dashboard, click on
Developers and then on
Api Keys.
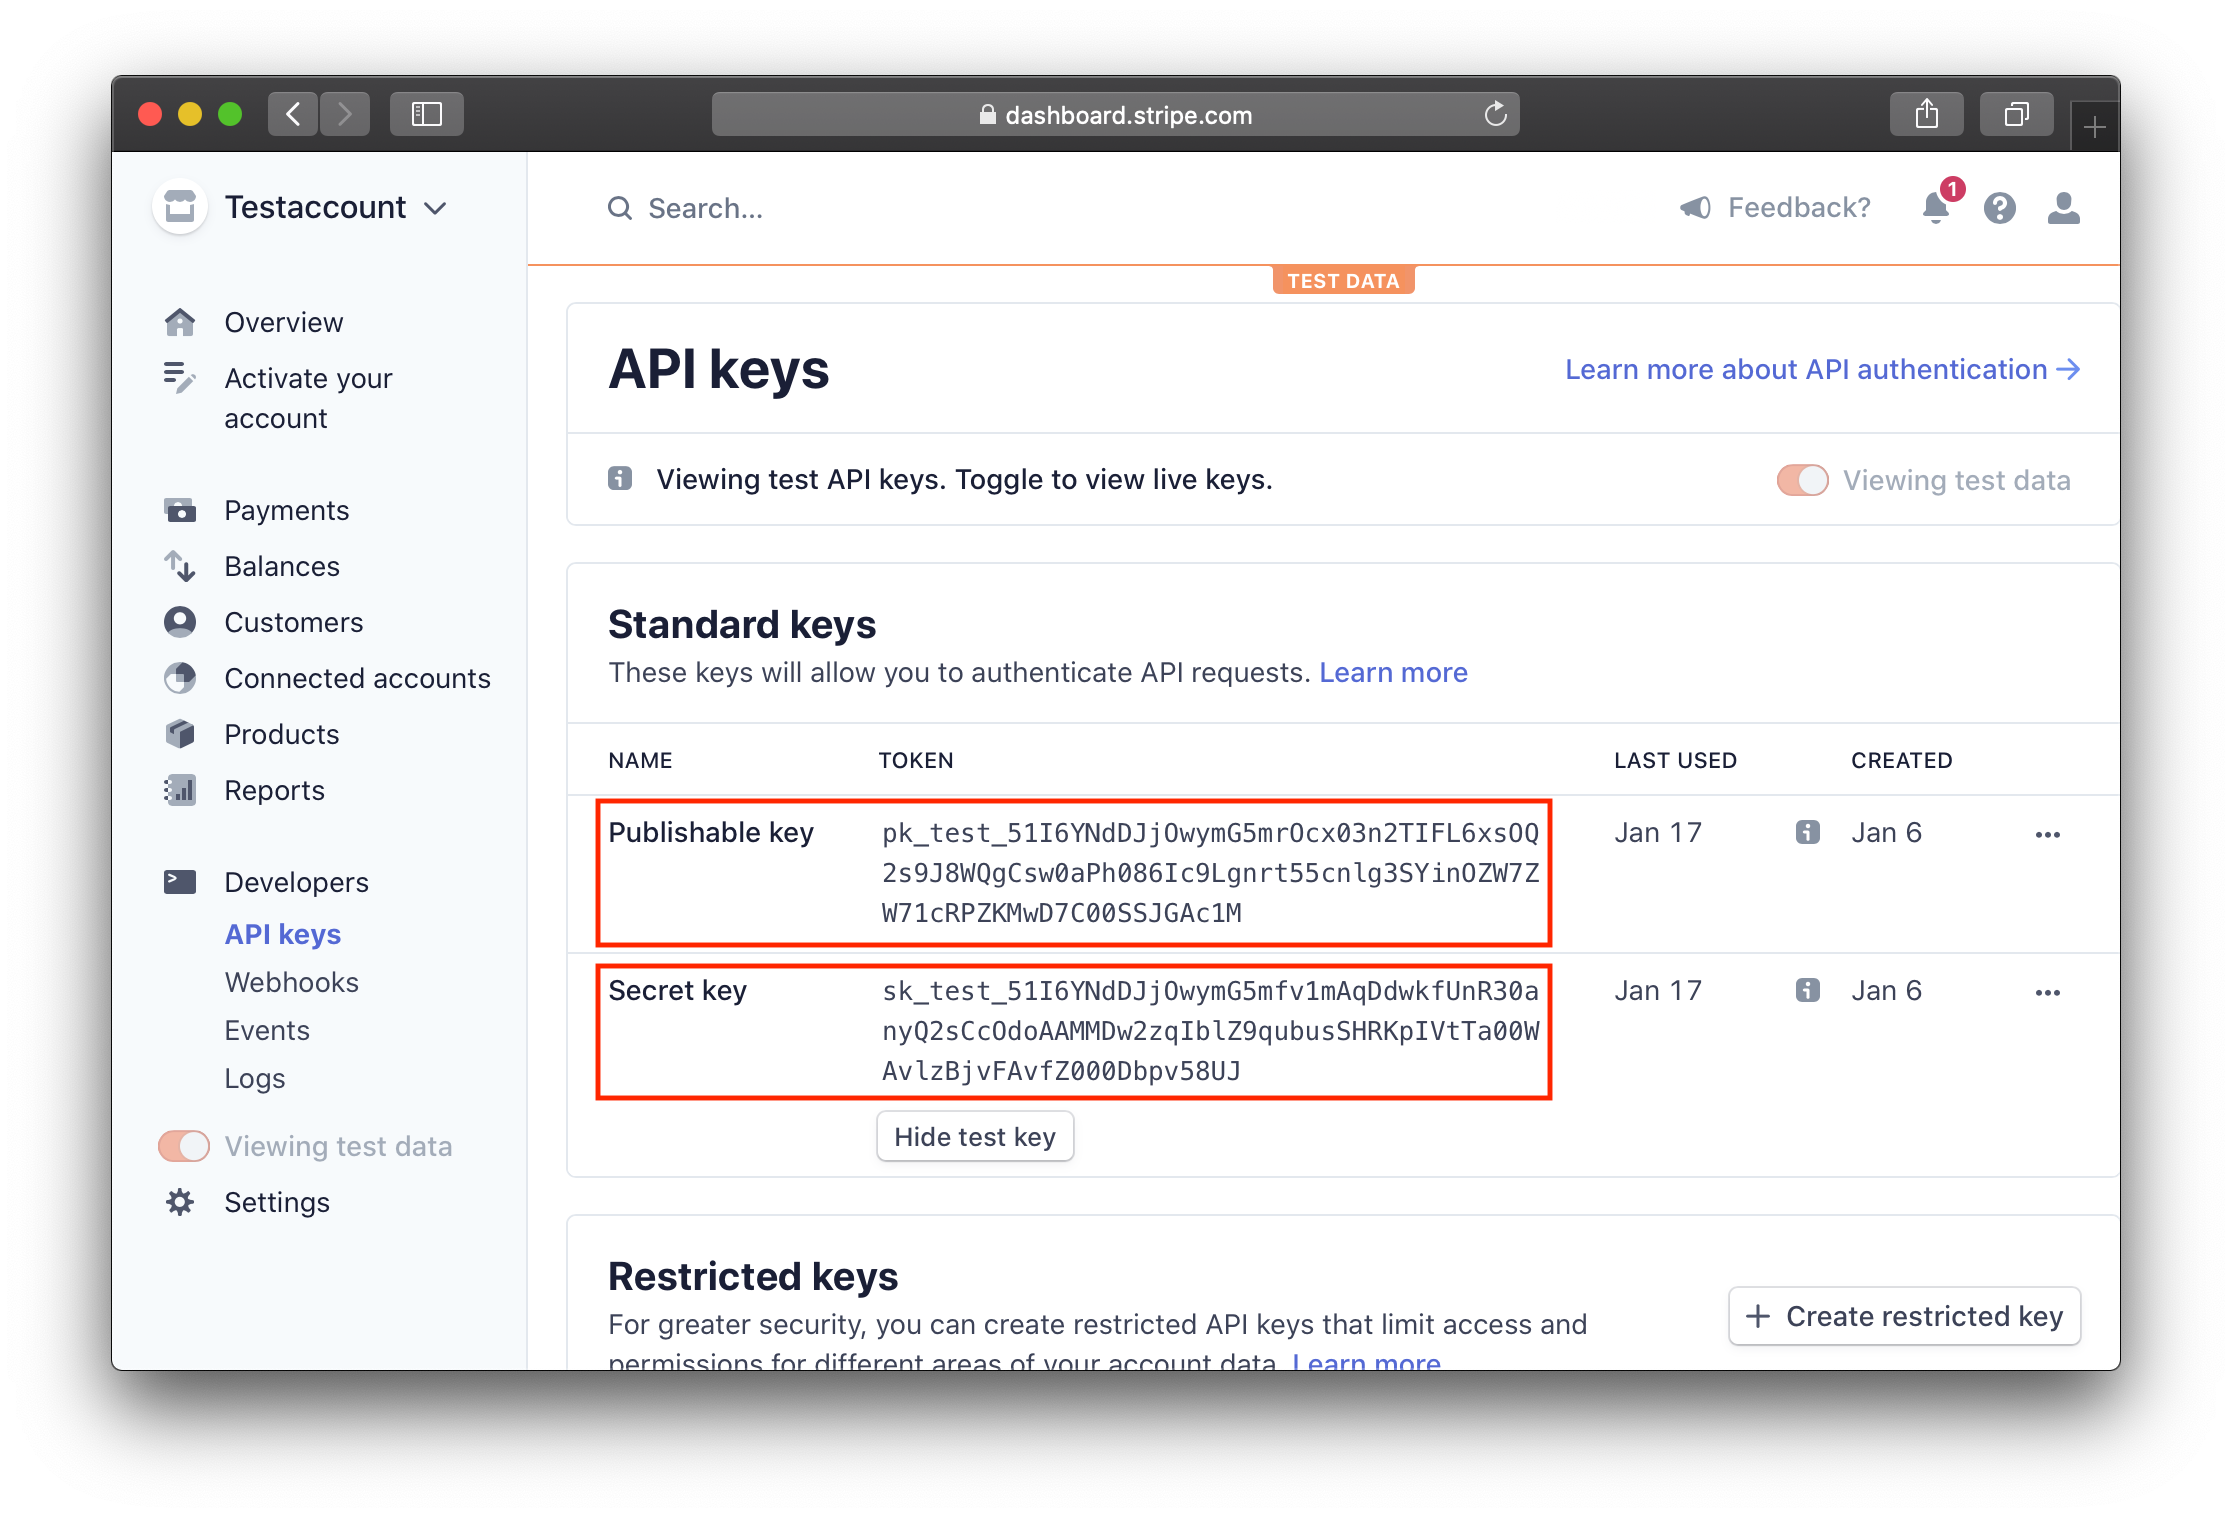
Open up your apps environment file, for example for development at ./envs/.dev/.app.
Copy the Publishable key and add it to STRIPE_PUBLIC_KEY.
Reveal the Secret key by clicking on reveal test key. Copy it
and
add it to STRIPE_SECRET_KEY.
STRIPE_SECRET_KEY=sk_test_TBjow9ejX474Rgu5HemHi8YzPCzMkHU9MyVTV4iAjwYz0fUfBU9MYnq04DgidlTm0warhwzgb3pYFteX00PYbHSAJbLUx8iY9C7
STRIPE_PUBLIC_KEY=pk_test_Ltcev2gMPAaPsJlWqGfE90CQEk4q6iqx7995llkOc8S9WmHf6HBG5MkH2HZpcMpylaxYO1czhqXsRSN6t2AcYjBW08hxMrBWamQ
In order for Docker to pick up changes in environment files, you need to rebuild and relaunch your stack:
docker-compose build && docker-compose upConfiguring plans
Launchr comes with 3 pre configured plans called Starter, Basic and
Pro. Each one of these plans is an item in the PLAN dictionary in app/settings/base.py.
You can run your app with as many (or few) plans as you'd like. The only thing that has to be done is to create the plan on Stripe and then attach the corresponding plan in your settings.
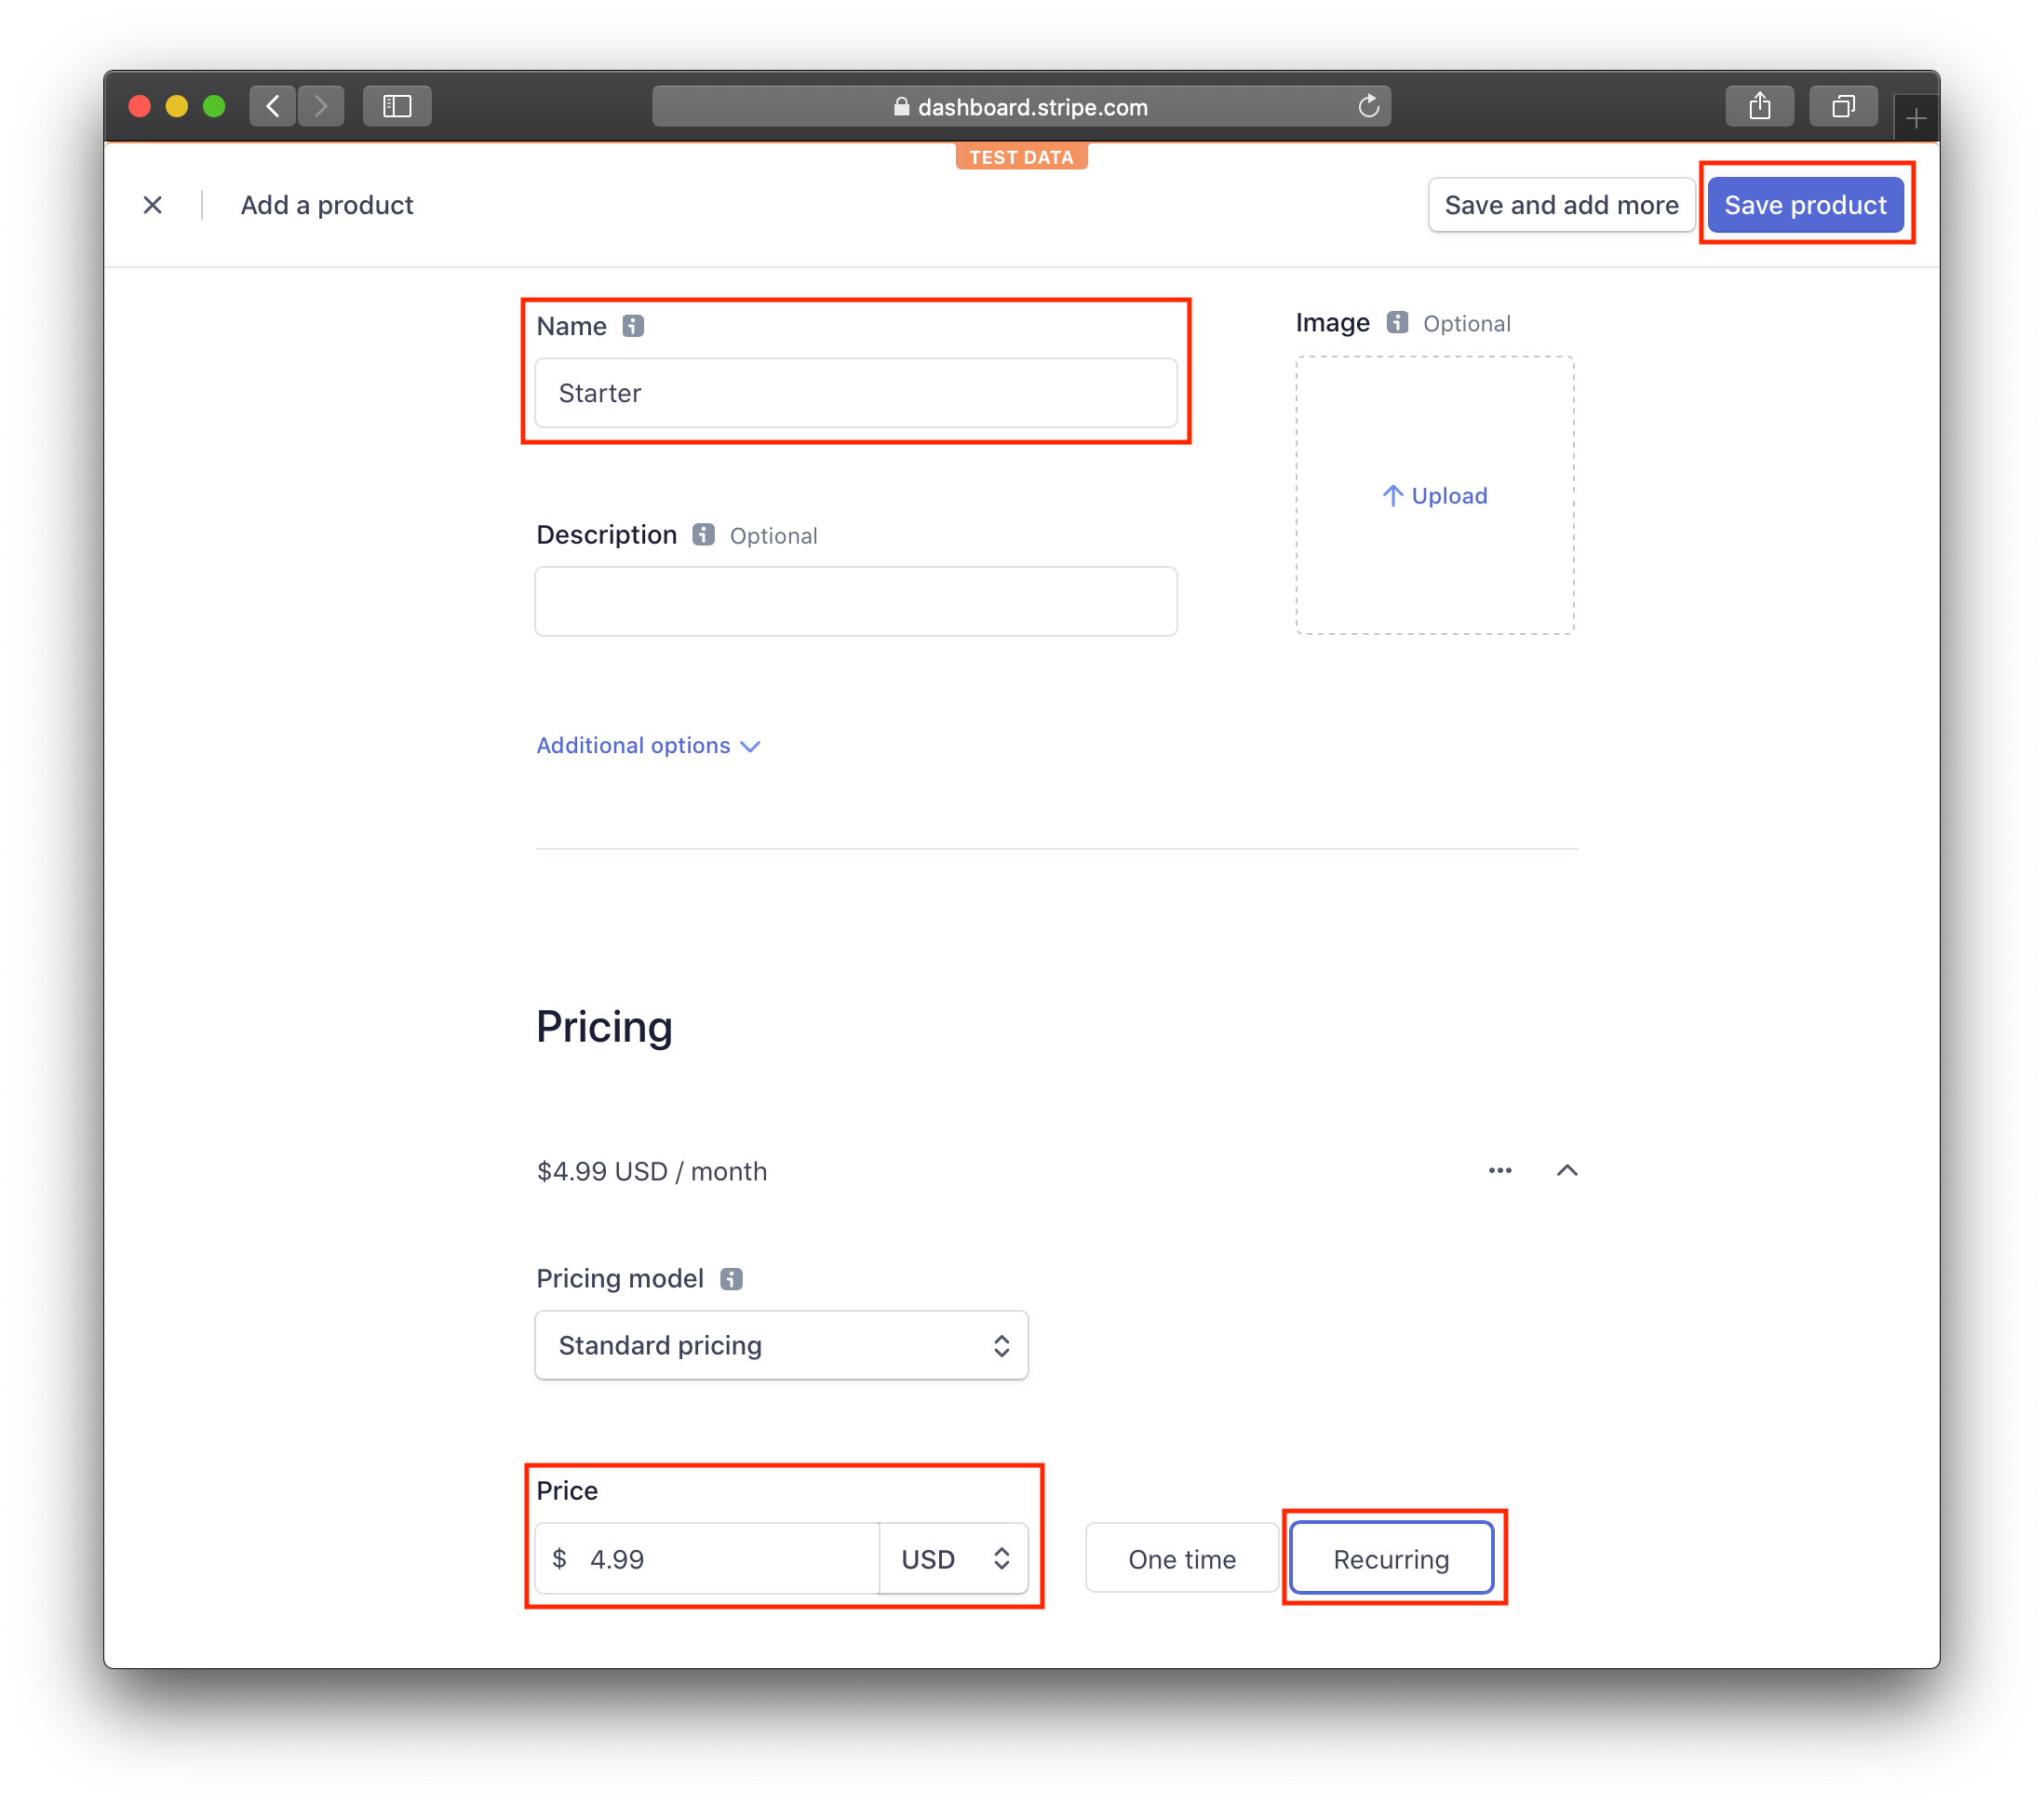
Adding plans on Stripe
Log into your Stripe dashboard and click on Products. Click the Add product button. Give your plan a Name and add a price. Make sure Recurring is selected. Click on the Save product button to save it.
If you are using the Launchr default settings, you need to create 3 plans on Stripe: Starter for $4.99/month, Basic for $9.99/month and Pro for $19.99/month.
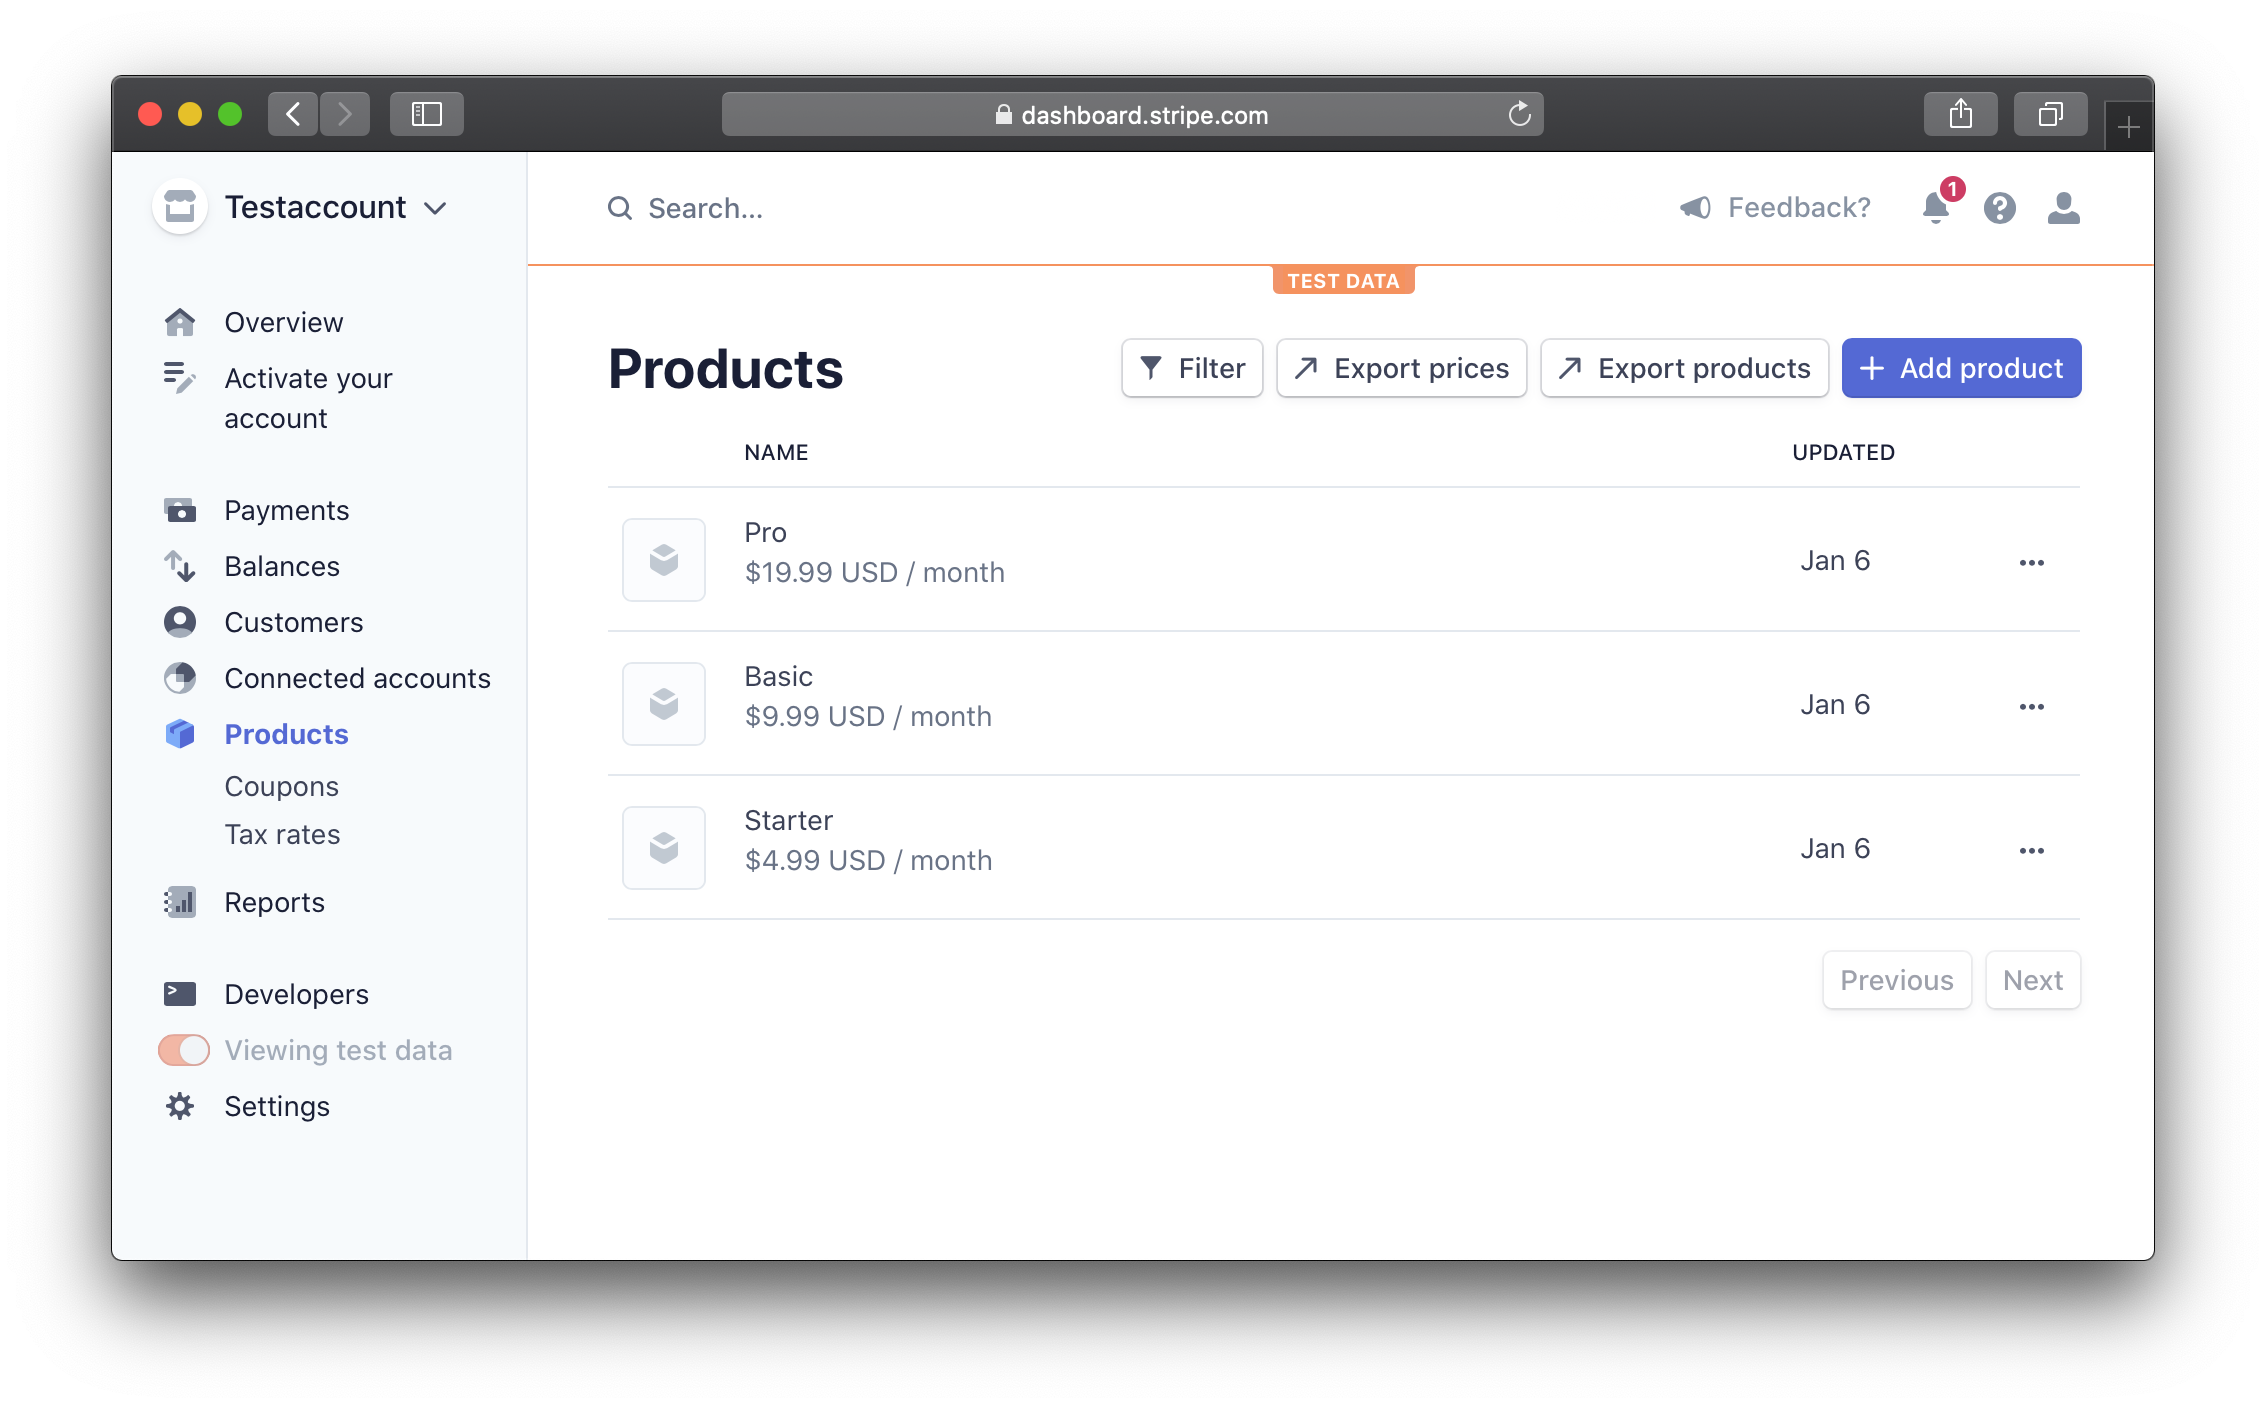
Using the default settings with Starter, Basic and Pro plan, your Stripe products page should look like in the screenshot below.
Attaching a Stripe plan to your app
Our app needs to know which plans configured in PLANS correspond to which plan on Stripe.
Since our app uses a different set of plans per environment (development/production), these are not configured in the base settings, but on the settings for the environment.
Log into your
Stripe dashboard and click on
Products. Click
on the product you want to attach to your app. Scroll down to the Pricing section and copy
the id that begins with
price_.
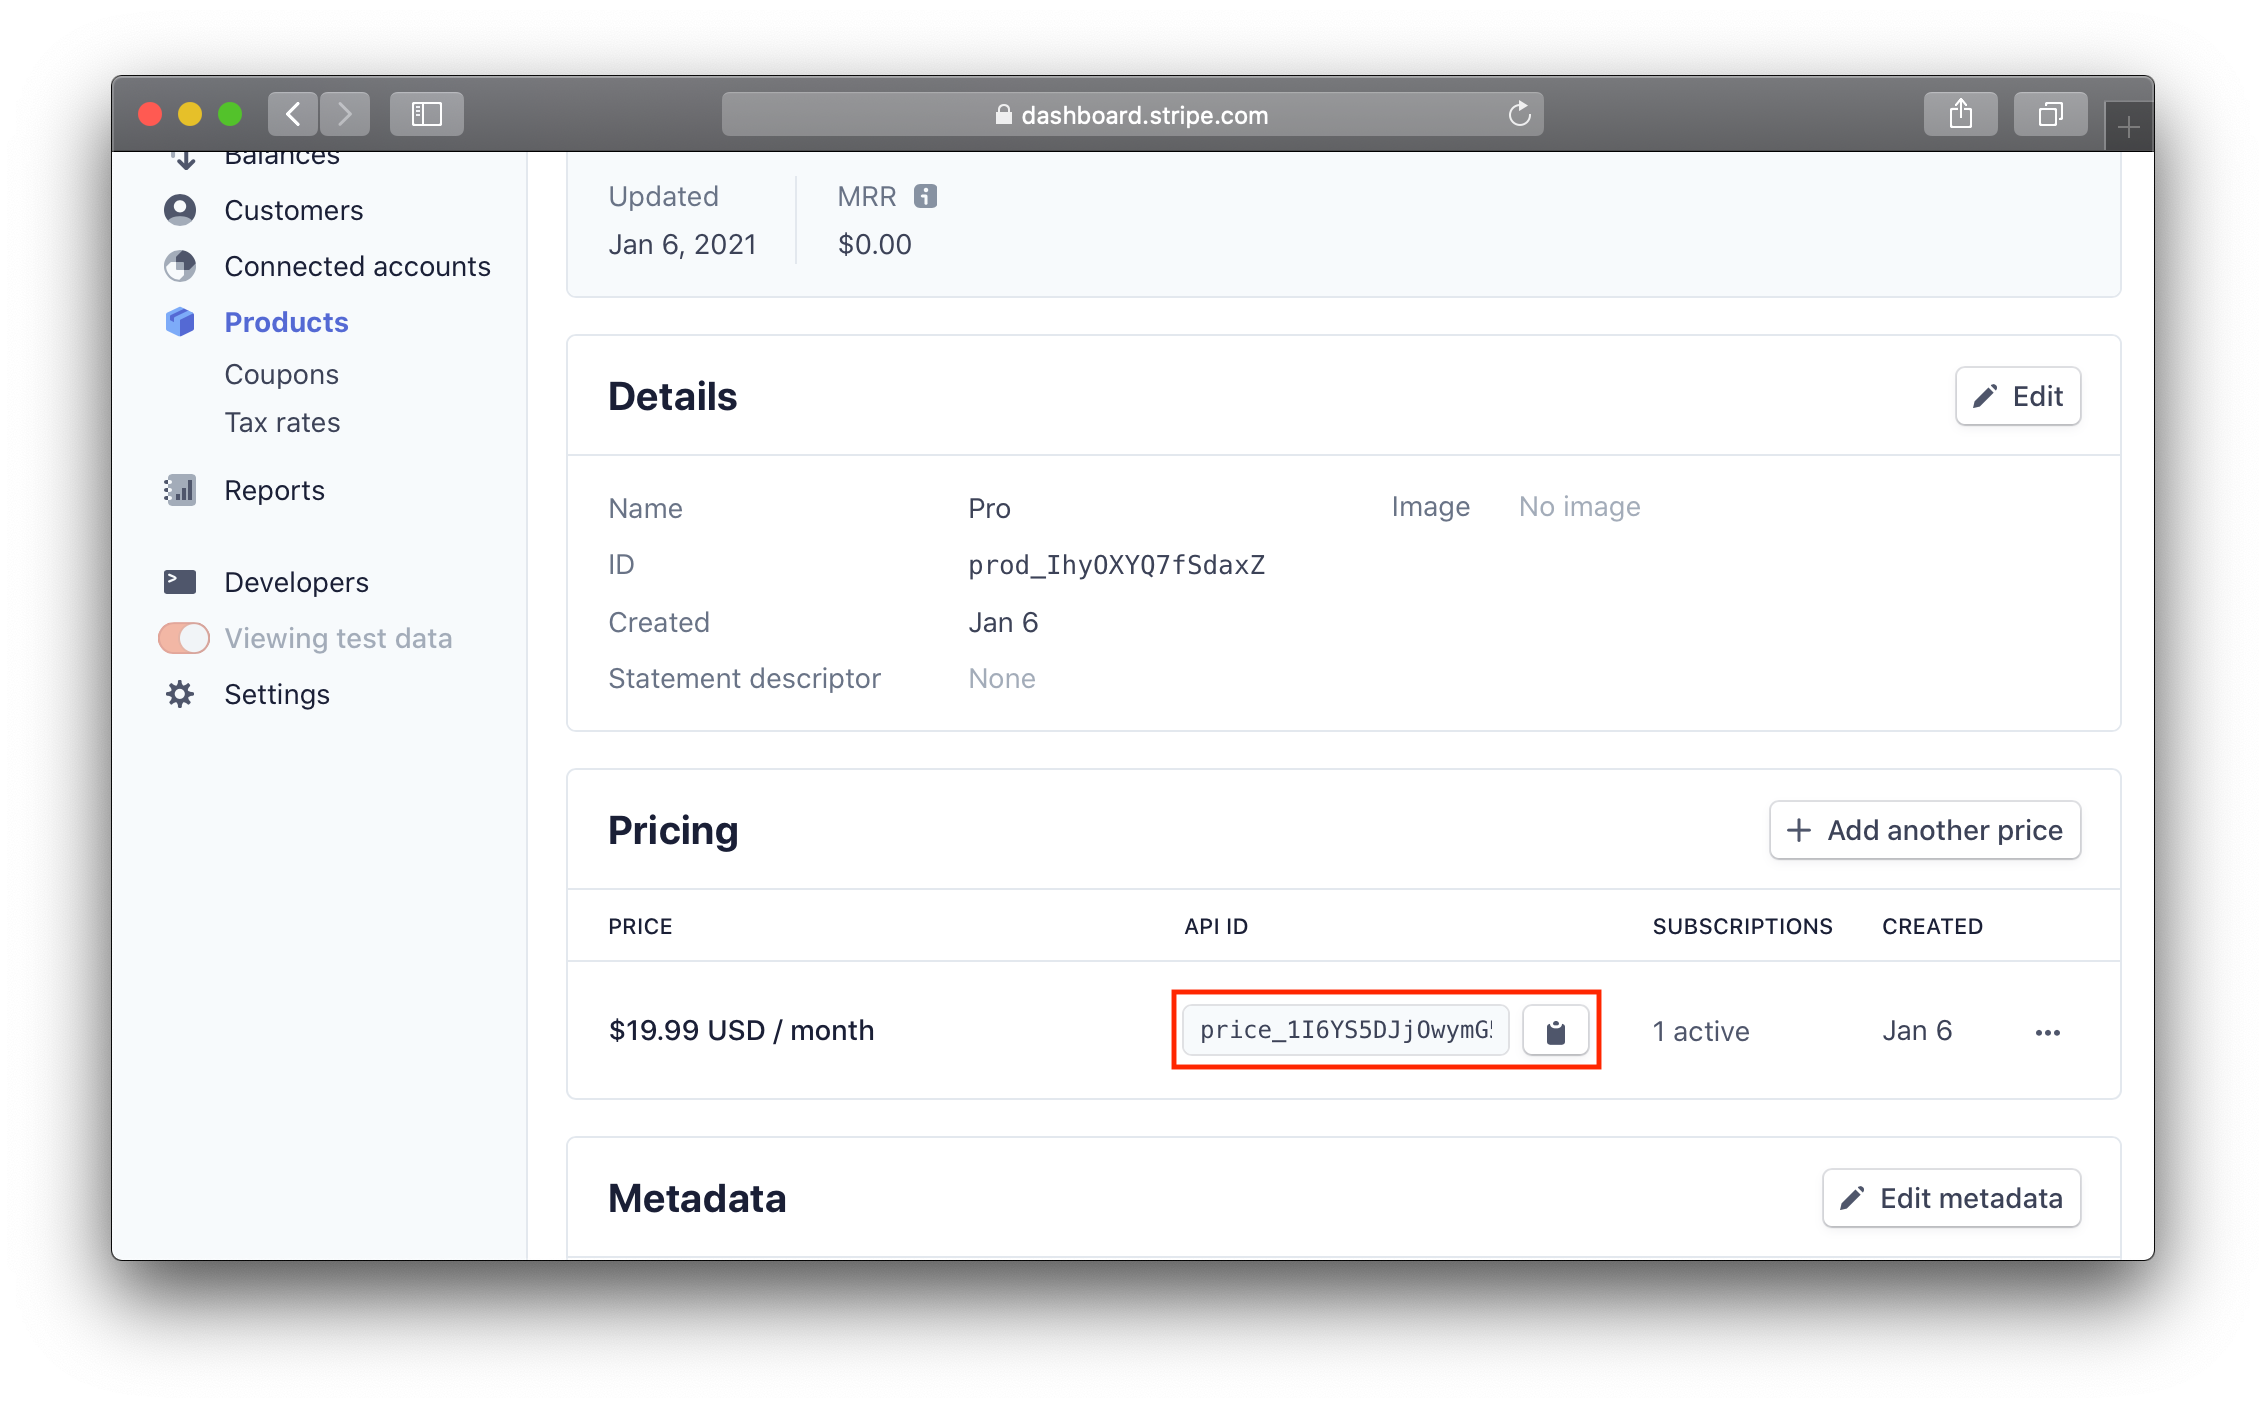
Open up your settings file for your environment. For development, this is app/settings/dev.py.
Paste the price_ to
the corresponding plan, for example the pro plan:
PLANS["pro"]['stripe_id'] = 'price_1I6YS5DJjOwymG5mZs8ecQJ5'If you are using the Launchr default settings, you need to attach the Starter, Basic and Pro plan.
Setting up webhooks
In order for Stripe to communicate changes back to our app, we need to set up webhooks.
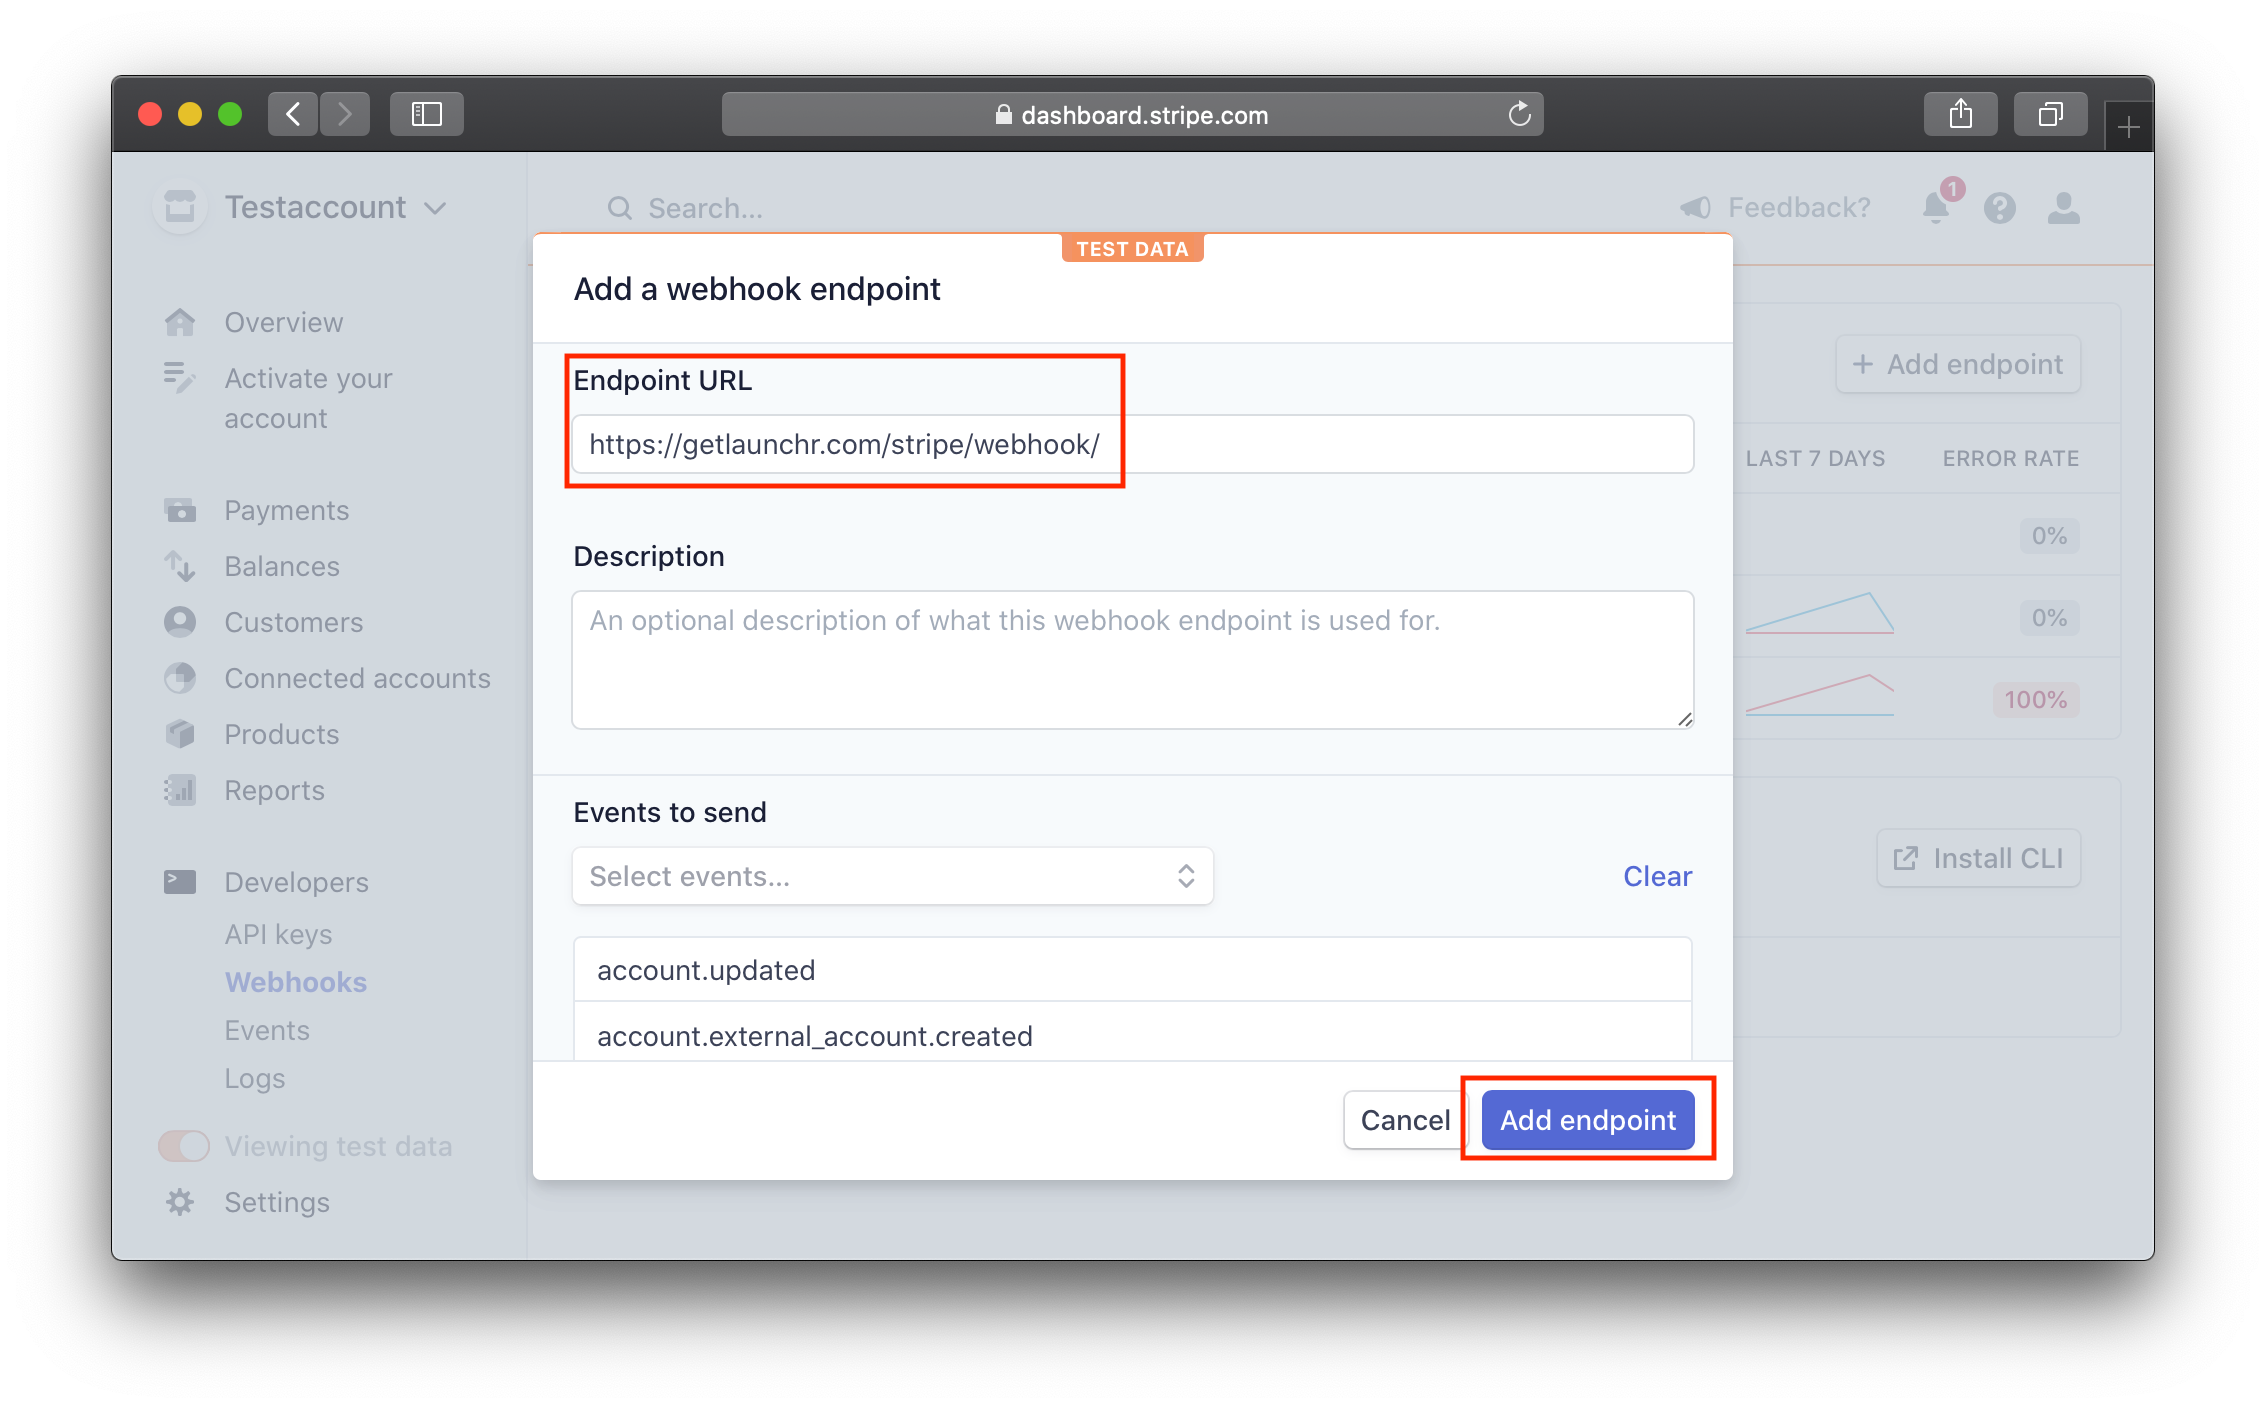
Log into your Stripe dashboard, click on Developers and then on webhooks.
Click on Add endpoint, fill in
https://yourdomain.com/stripe/webhook/ as Endpoint URL,
scroll down to the events section, click on receive all events and then click on
Add endpoint.
On the webhook detail page, scroll down to the Signing secret section and click on reveal.
Copy the key that begins with whsec_ to your clipboard.
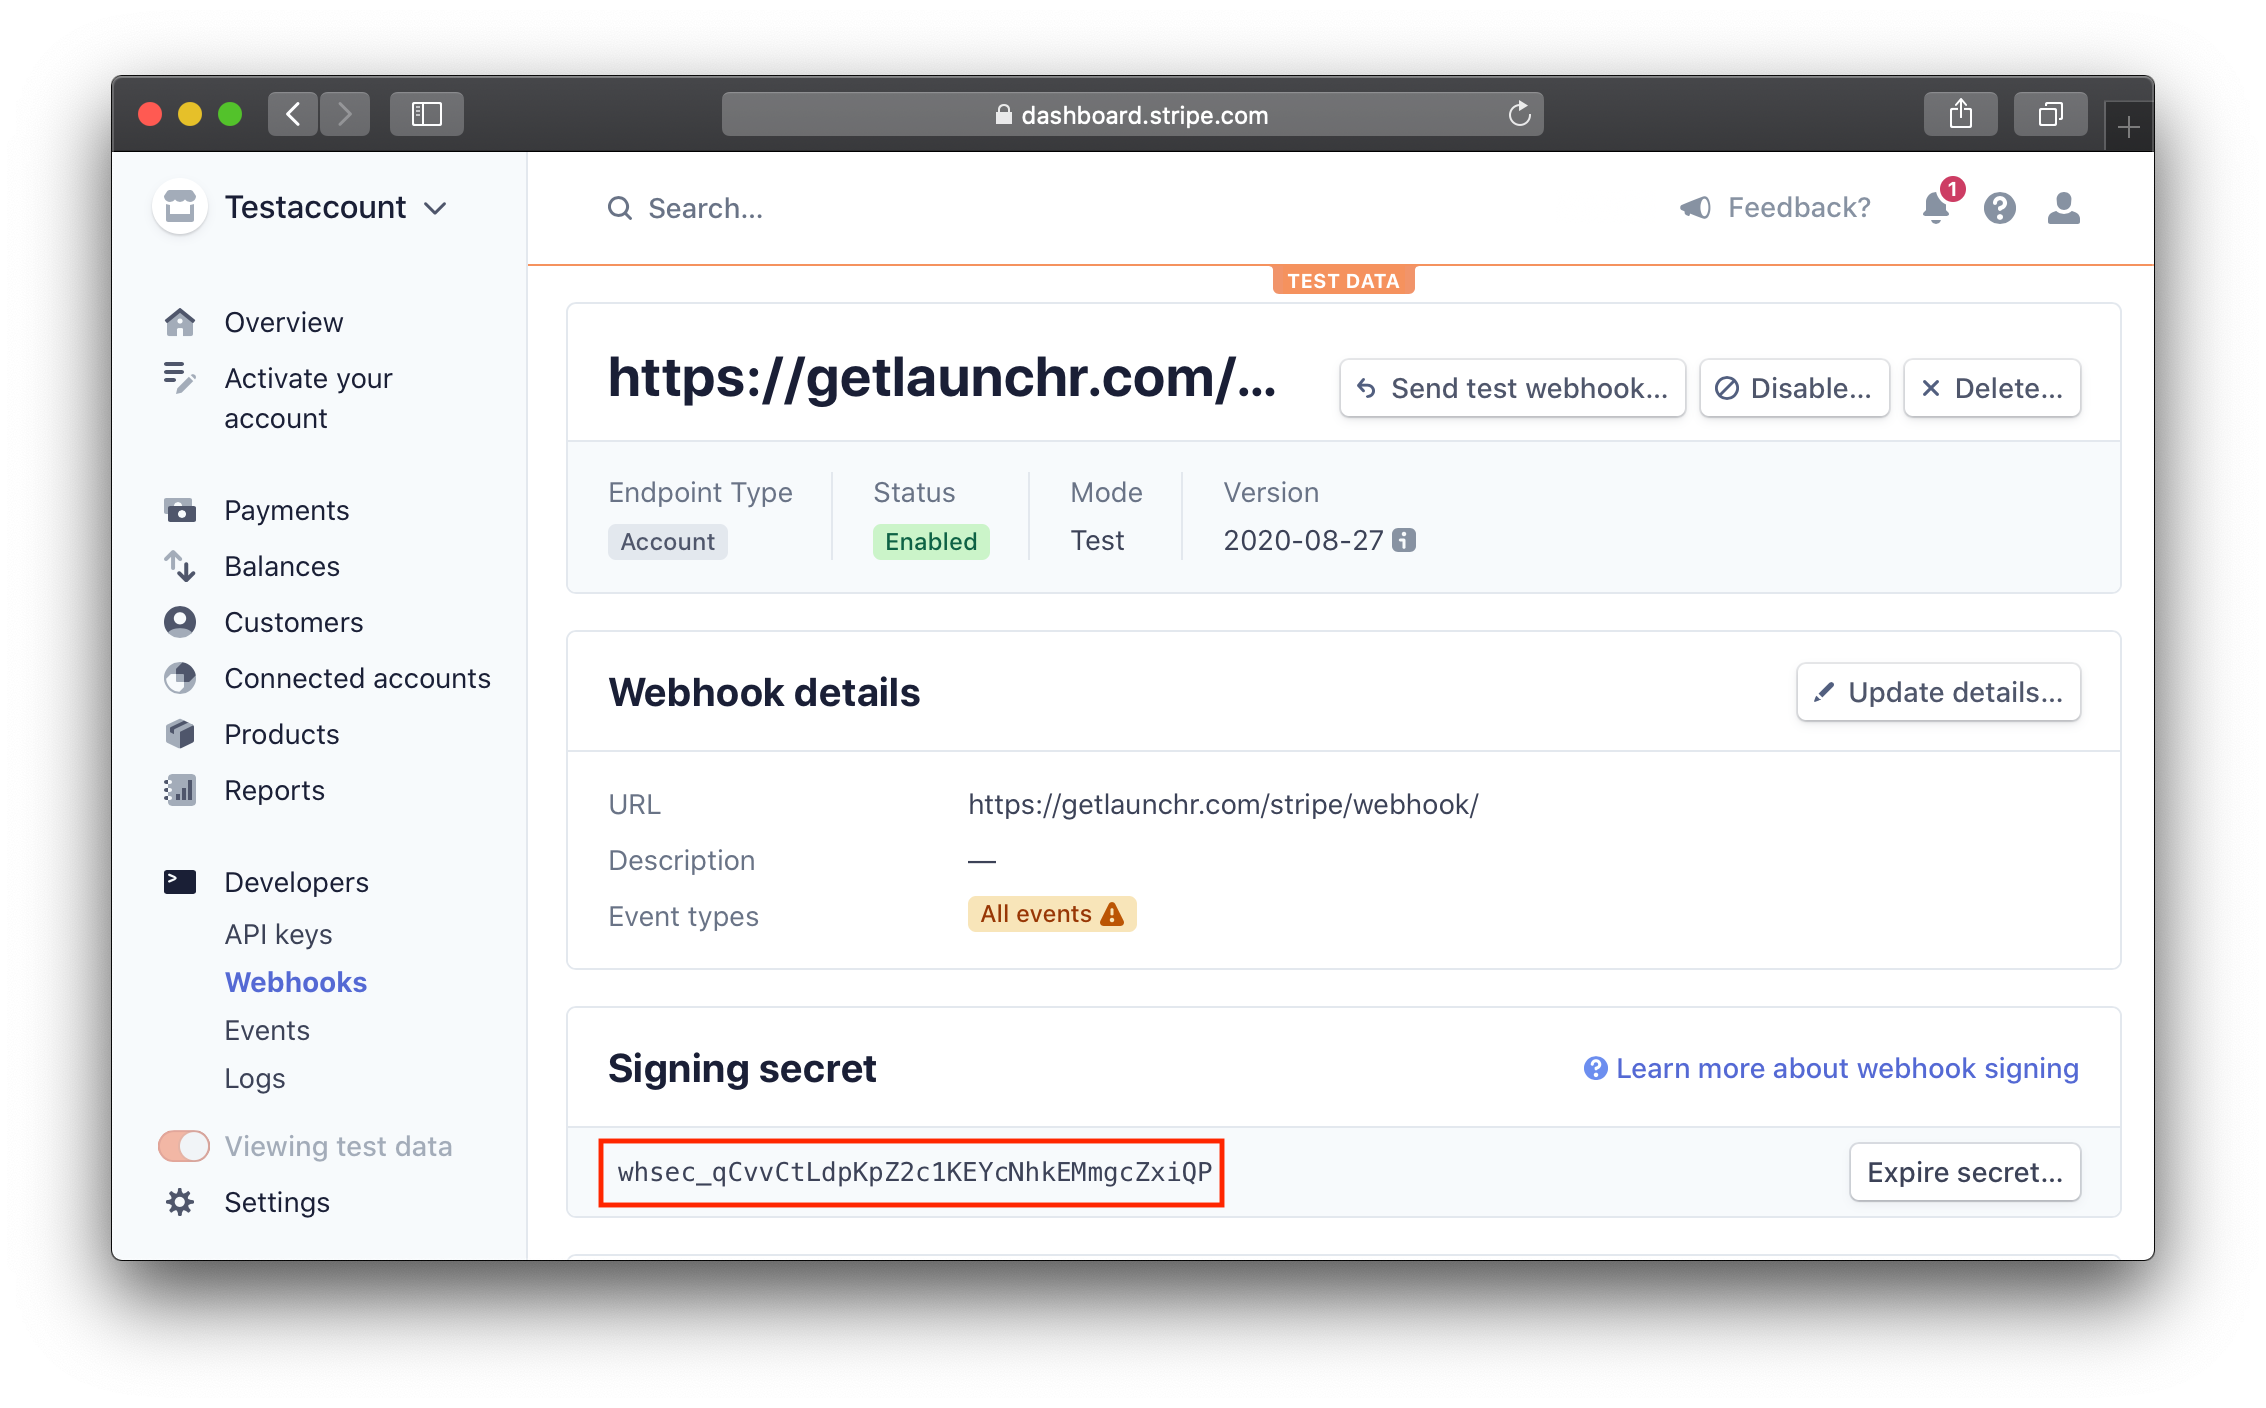
Open up your apps environment file, for example for development at ./envs/.dev/.app, and
paste the key you just copied to STRIPE_WEBHOOK_SECRET.
STRIPE_WEBHOOK_SECRET=whsec_qCvvCtLdpKpZ2c1KEYcNhkEMmgcZxiQP
Webhooks during development
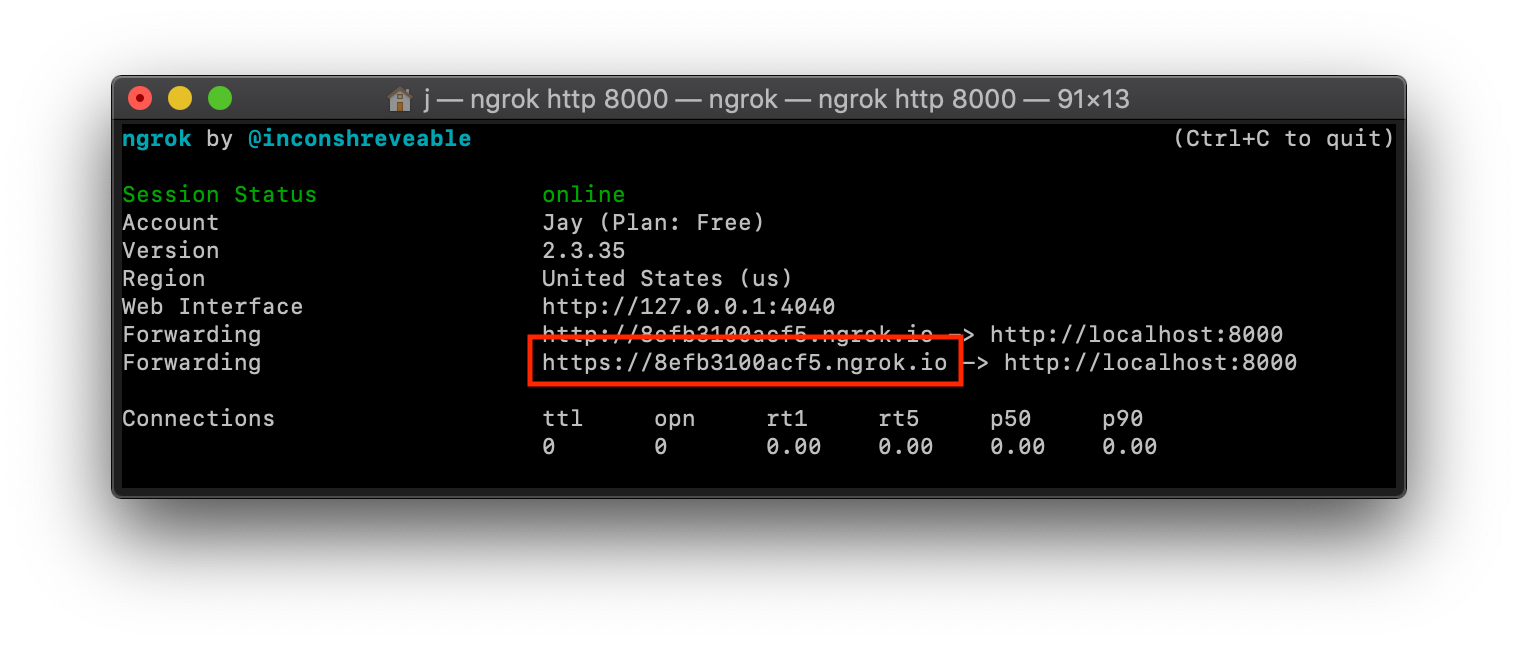
In order for Stripe to send us webhooks during development, we need to make our app reachable for them on the internet. To achieve this, we are going to create a tunnel to localhost with ngrok.
Sign up for an account on ngrok and install the command line utility.
Open up a new terminal and run the command:
ngrok http 8000This creates a tunnel to our local development environment, which gives us a URL to fill in as Endpoint URL at
Stripe. Instead of https://yourdomain.com/stripe/webhooks/, we can now use the URL ngrok
created for use, for example https://_ngrok-url_/stripe/webhooks/.